
Beginner’s guide · 5 illustrated steps
What Are Fuse Beads?
Fuse beads are small plastic tubes you arrange on a pegboard, one bead per peg. Cover the design with ironing paper, warm it with an iron, and the neighboring beads join into a piece of colorful pixel art. This guide shows what to buy, how the process works, and how to finish a first project safely.
See the five stepsThe short answer
Tiny beads, one solid design
People also call them melty beads, iron beads, or ironing beads. “Perler beads” is common shorthand, but Perler is a brand name. Hama, Artkal, and MARD have their own beads and color codes. The basic idea is much like making a picture from pixels: each upright bead is one colored square in your pattern.
The pegboard holds those loose beads in place while you build the image. Heat softens their tops so neighboring beads bond. The finished piece can keep visible holes, or it can have a flatter surface if you fuse it longer. For a first project, a light, even fuse is easier to control. Perler’s official fusing instructions recommend medium heat, circular movement, and adult handling of the iron.
Loose fuse beads are small parts. Keep them away from children under three, follow the age guidance on the product packaging, and reserve ironing for an adult. The U.S. Consumer Product Safety Commission’s toy-safety guidance recommends keeping small parts away from children under three.
Starter kit
What do you need to start?
Fuse beads
Choose a bead size and a small range of colors. For most first projects, the familiar 5 mm midi size is easy to handle.
A matching pegboard
A square board is flexible for pixel patterns. Check that its peg spacing matches your beads.
A simple pattern
Use a printed grid, sketch your own, or make an editable plan with the Meltbead pattern maker.
Paper, iron, and a safe surface
Use ironing paper or baking parchment, a dry household iron, and a flat surface that tolerates heat. Tweezers are optional.
Hama’s official instructions also describe the same core sequence: place beads, iron through paper, then remove the cooled design. Follow the instructions packaged with your specific beads and board.
From loose beads to finished art
How to make your first fuse bead project
The fox in these original teaching images follows the same design from start to finish. Keep your own first pattern small enough to finish in one sitting.
Images are AI-generated visual examples of the process.
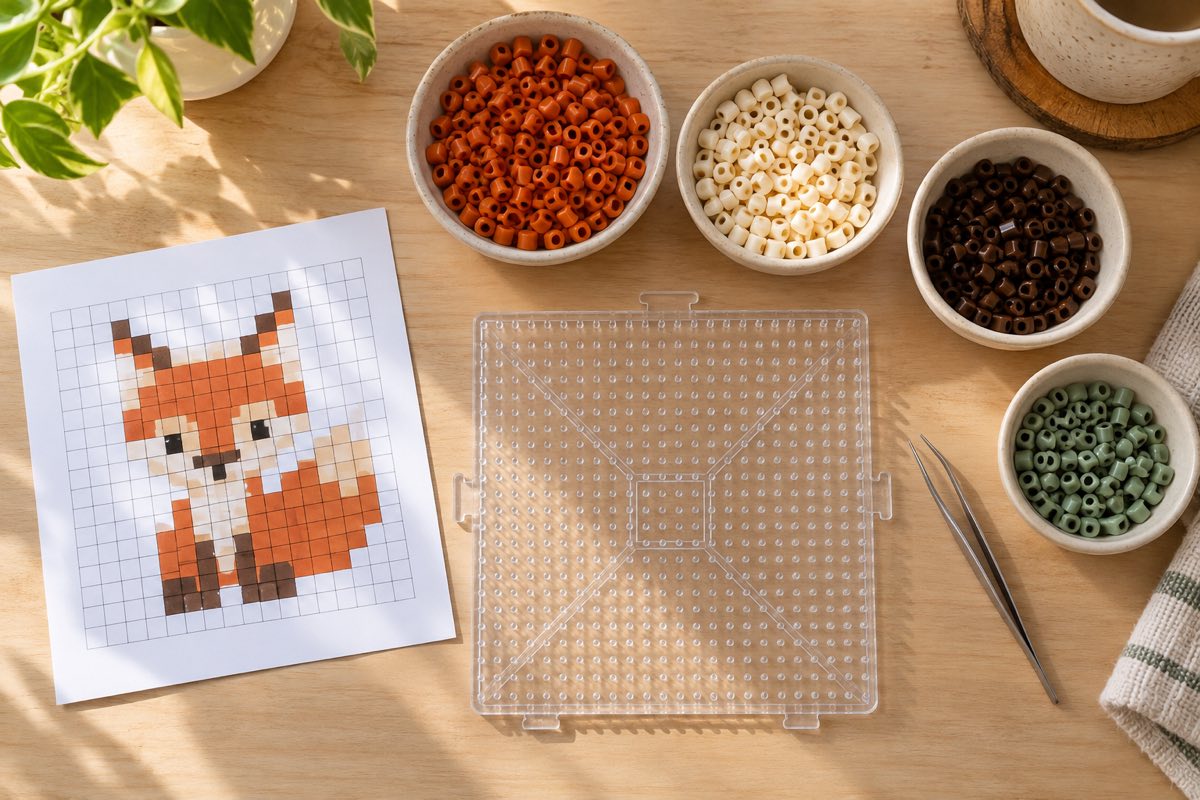
Step 1 of 5
Pick a small pattern and sort your colors
Start with a simple shape that fits one board. A heart, flower, or little animal is easier to finish than a detailed portrait. Count the colors in your pattern, then put each color in a shallow dish so you can find it without digging through a mixed tub.
Beginner tip: For a first project, choose a design with clear outlines and only a few colors.
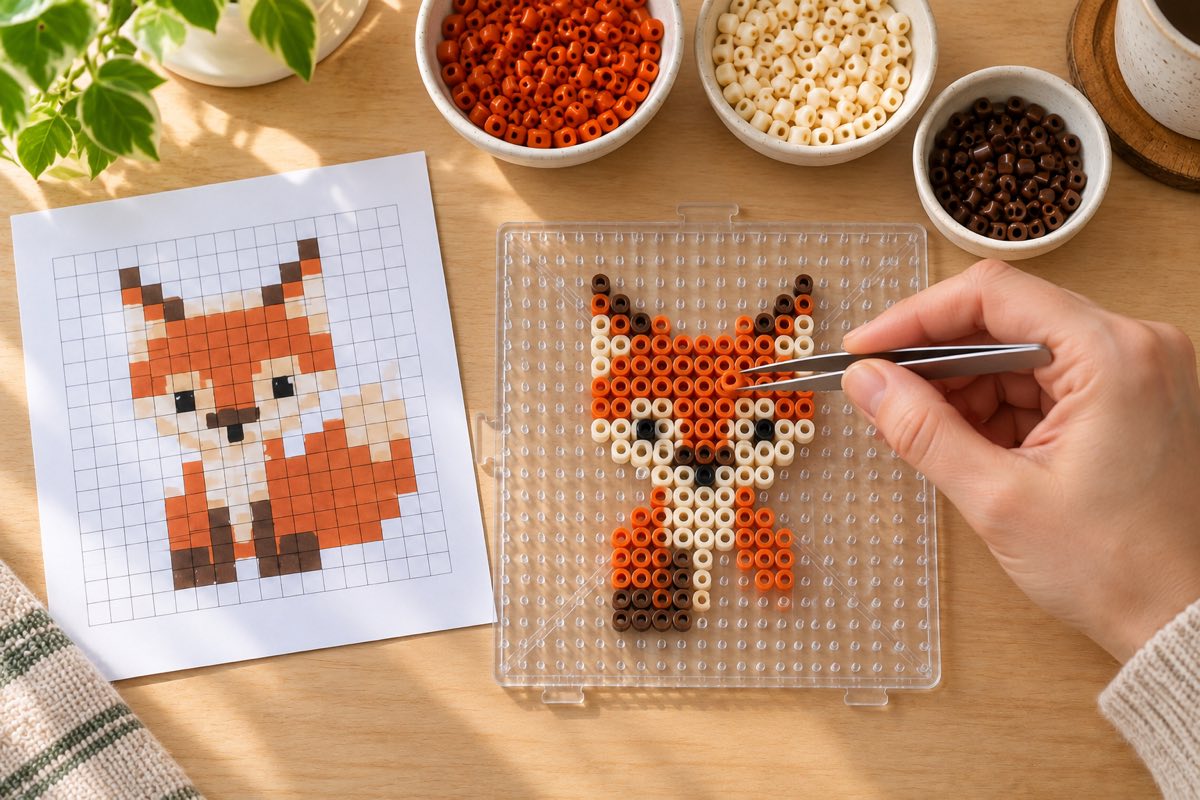
Step 2 of 5
Place the beads on the pegboard
Stand each bead upright over a peg. Follow your pattern one row at a time, or make the outline first and fill the middle. Tweezers help with tight spaces, but fingers work too. Keep the board on a steady table; one accidental bump can scatter an unfinished design.
Beginner tip: Each square of a pixel pattern corresponds to one bead on the board.
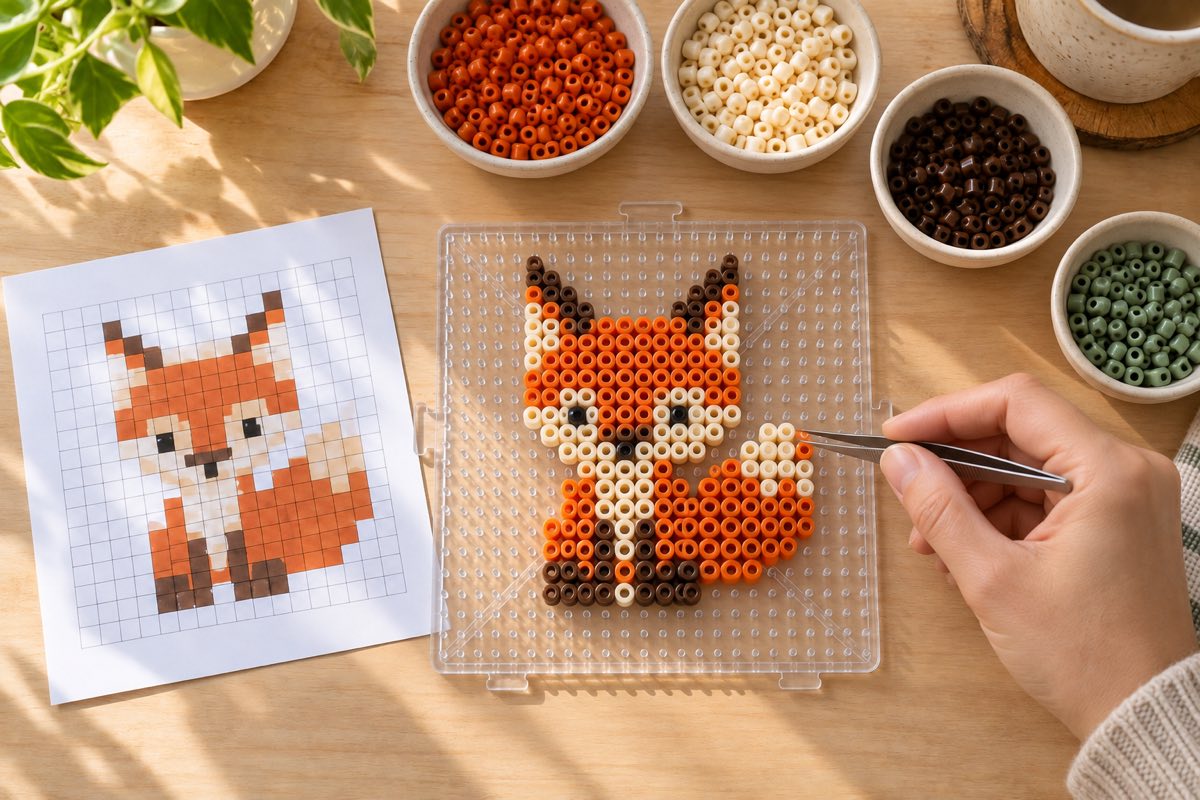
Step 3 of 5
Check the design before applying heat
Look at the board from directly above. Check for a missing bead, a stray color, and spaces that should stay empty. The beads are easy to move now. Once fused, that color choice is permanent, so this is the best moment to make corrections.
Beginner tip: Take a quick photo of the unfused layout. It gives you a reference if a bead shifts.
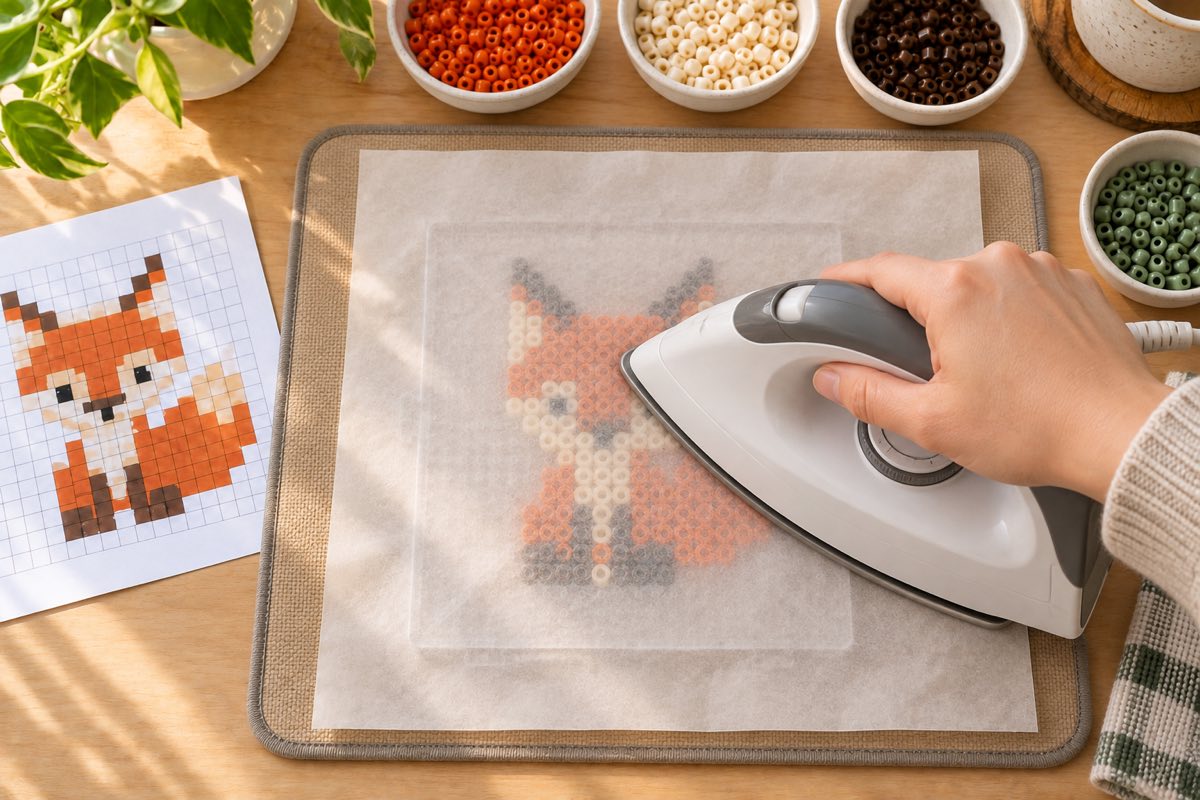
Step 4 of 5
Cover and fuse the beads
Move the board to a flat, heat-safe surface. An adult should place ironing paper or baking parchment over the design and use a dry household iron on medium heat. Keep the iron moving in gentle circles with light pressure. Lift it to check the joins rather than holding it in one place. Never touch bare beads or the pegboard with the iron.
Beginner tip: For the smooth, closed-hole finish shown next, use extra short passes and check often. Irons and bead brands soften at different rates.

Step 5 of 5
Cool it flat and check the result
Let the first side firm up, then lift the piece carefully from the board. If the design needs more strength, turn it over and fuse the back through fresh paper. Put clean paper over the warm piece and cool it under a flat book. Once it is completely cool, remove the book and check that the beads form one connected piece.
Beginner tip: This is a flat-fused finish: the bead holes and individual outlines have disappeared into one continuous surface.
Choose a comfortable scale
Bead sizes and brands
Midi beads are a practical starting size. Mini beads let you fit more detail into the same physical space, but placing them takes steadier hands and a matching mini pegboard. Hama also sells larger Maxi beads. Its brand history traces the introduction of Midi, Mini, and Maxi as separate sizes.
Color names do not always mean the same shade across brands. If you are following a pattern with product codes, use the chart for the beads on your table: Perler, Hama, Artkal M Mini, or MARD. Screen colors are references, so compare important shades with physical beads.
Quick answers
Fuse bead FAQs
Are fuse beads the same as Perler beads?
Fuse beads is the general craft term. Perler is one brand; Hama, Artkal, and MARD are other bead systems. Match the bead size to the pegboard, and test a small patch before combining brands because their colors and fusing behavior can differ.
Do you need an iron to make fuse bead art?
You can arrange a design without heat, but ordinary iron-fuse beads need controlled heat to turn the loose beads into one piece. An adult should handle the iron. Water-fuse beads are a different product and need their own instructions.
What can you make with fuse beads?
Start with flat decorations, magnets, ornaments, or small pixel-art figures. Once you are comfortable placing and fusing beads, you can plan larger mosaics or assemble separate fused pieces into a three-dimensional object.
Professional references
Sources behind this guide
These official manufacturer and consumer-safety resources support the material, fusing, cooling, and small-parts guidance in this article. Always follow the instructions and age guidance supplied with the specific beads you buy.
Perler
Frequently Asked Questions
Material information, dry-iron guidance, and advice on testing a small patch before fusing a finished project.
Hama
Ironing Instructions
Official instructions for placing beads on a pegboard, moving an iron through paper, and cooling the finished design under a book.
U.S. Consumer Product Safety Commission
Small Parts and Choking Hazard Guidance
Authoritative reference on the choking risks that small parts can present for children under three.
Ready to try one?
Turn an idea into a bead grid.
Use the free pattern maker to choose a palette, simplify an image, and export a plan you can follow at the craft table.